WordPress is a go-to choice for millions of users for building and managing websites. But like any other platform, WordPress itself isn’t free of all challenges. One common challenge most users face while migrating and cloning a website is it ‘fails to import media files.’
This frustrating issue can blockade the seamless transfer of media files, disrupting the visual appeal and functionality of your website. This is why learning and understanding how to fix ‘WordPress failed to import media files’ is so important.
This article will cover a complete guide on how to troubleshoot this issue, explaining all the possible methods. Be with us till the end.
Reasons Why WordPress May Fail to Import Media Files
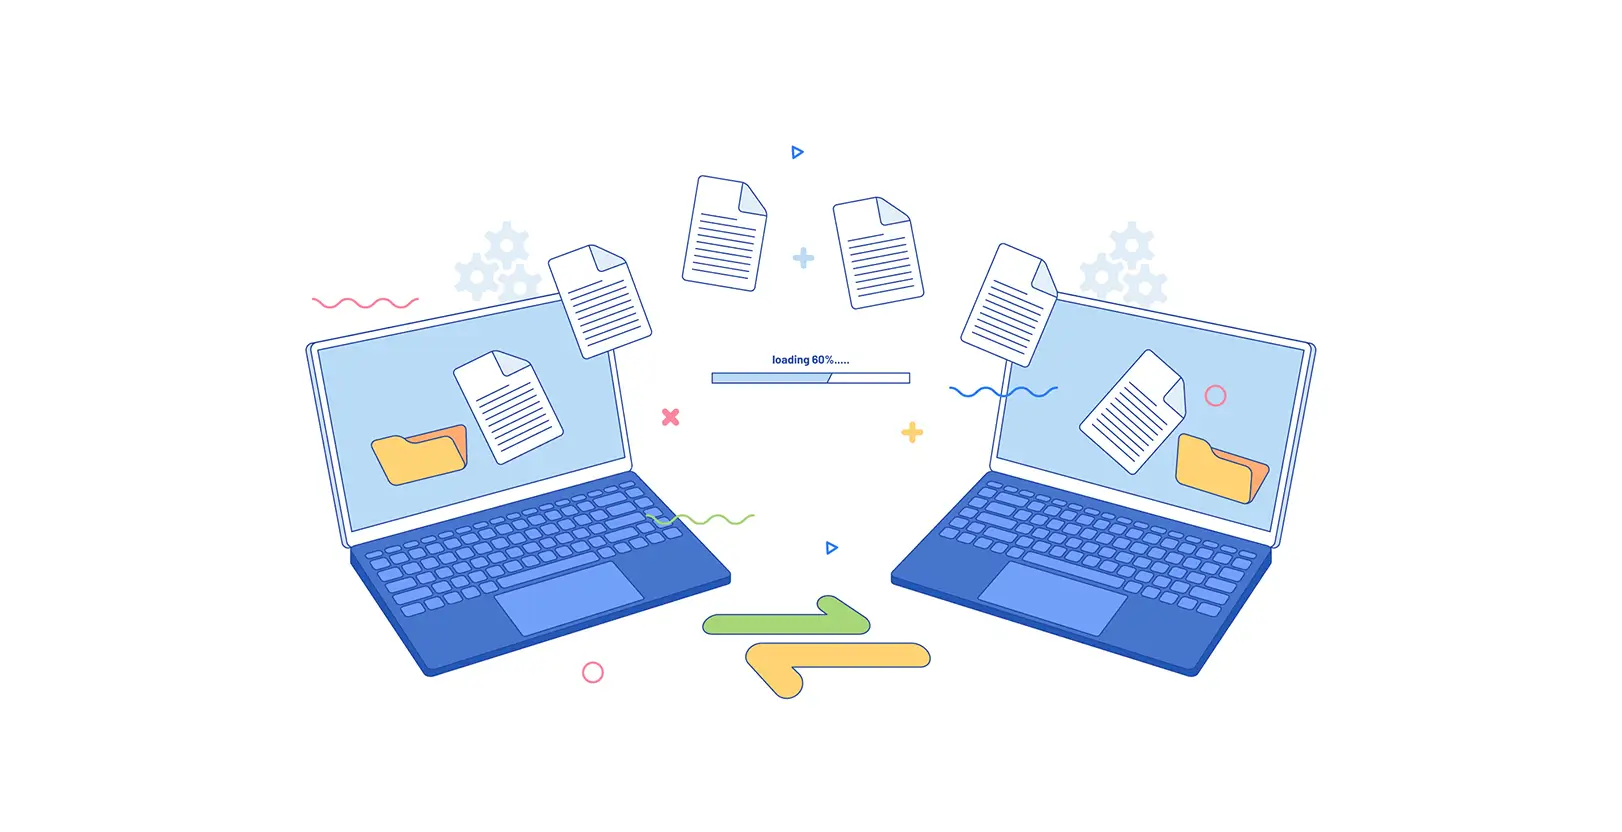
There are numerous reasons why WordPress may fail to import media files. If any of these problems arise, you will face this problem. We have listed these potential reasons below.
- PHP memory limit
- File size limitations
- File and folder permissions
- Server misconfiguration
- Connection issues
- File format compatibility
- Insufficient disk space
- Corrupted media files
- Plugin and theme conflict
In the next section, we’ll explain how to solve these problems.
How to Fix WordPress Failed to Import Media Files
Actually, there is no single straightforward way to troubleshoot the problem – WordPress importer failed to import media files. As it may happen from various separate issues, you have to implement different approaches one by one to solve this problem. Follow us.
Step 01: Check and Increase PHP Memory Limit
PHP memory limit defines the maximum amount of memory a PHP script can utilize on a website. If you have to import a large number of media files at once, the entire import process may fail due to the limited PHP memory.
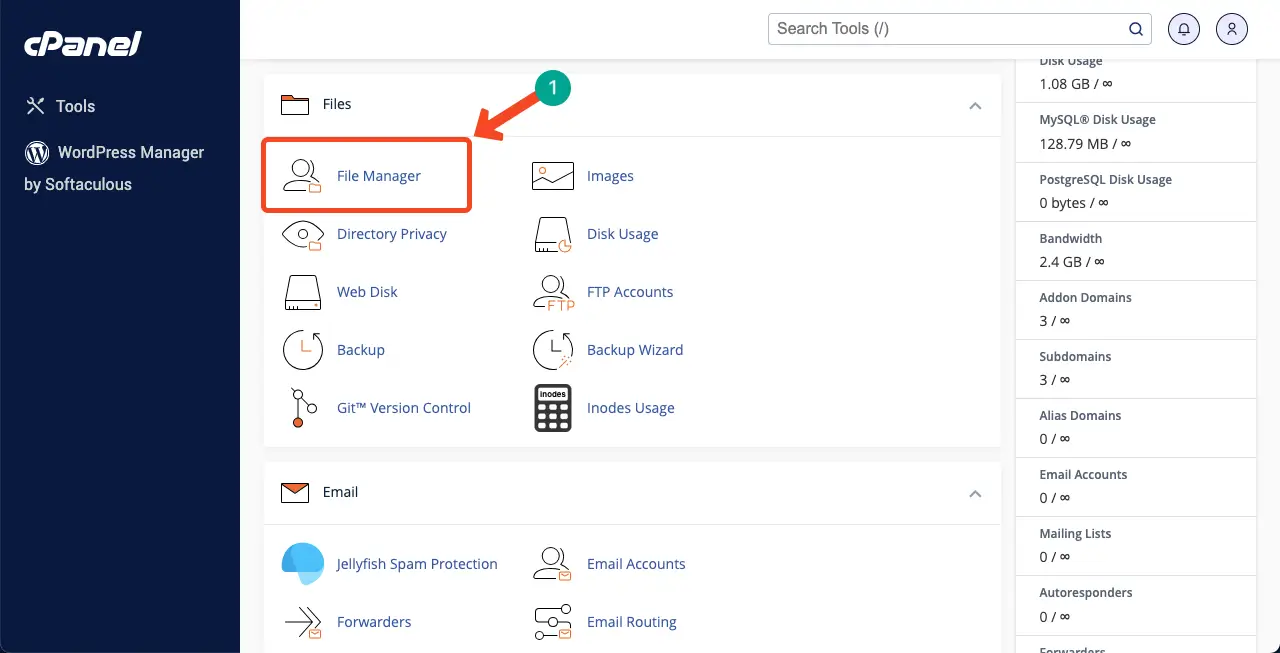
By default, the PHP memory limit is 32 MB. To increase the PHP memory limit, log into your cPanel and go to File Manager.
Go to public_html> your website > wp-config.php.
Open the wp-config.php file in its edit mode by right-clicking on your mouse.
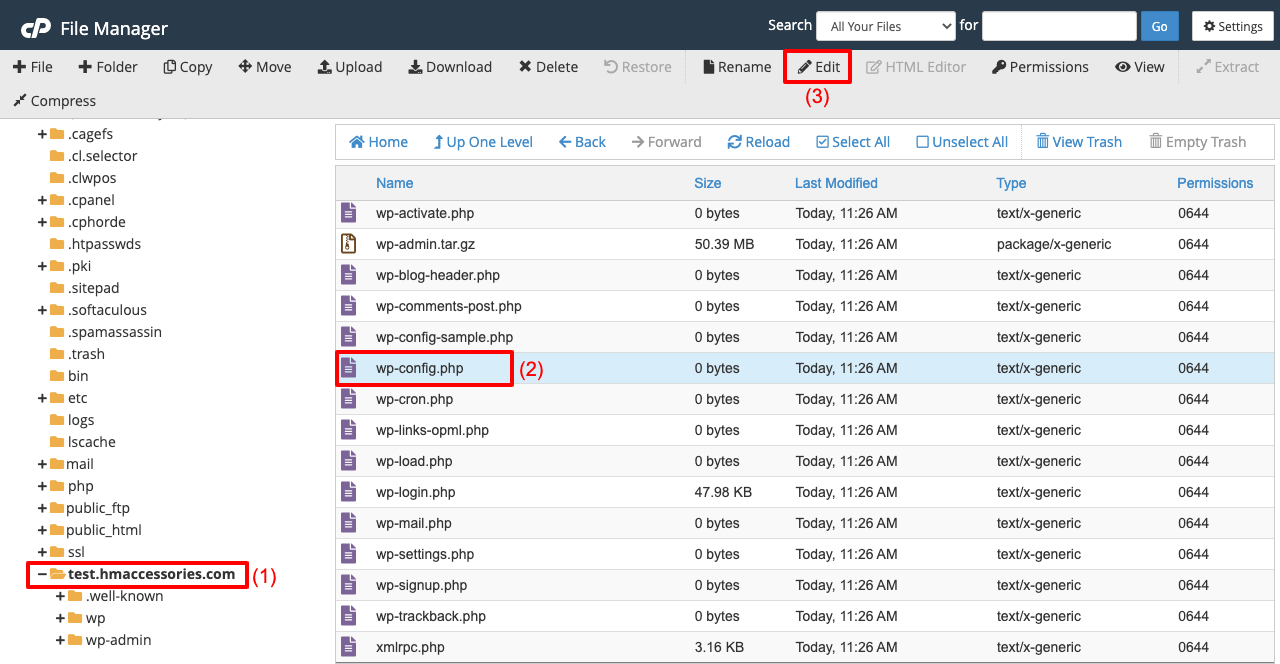
Copy-paste the code written below to the respective section into the wp-config.php file you opened just a while ago. You can increase the PHP memory size as much as you want in this code. But we think 256MB is enough.
define( ‘WP_MEMORY_LIMIT’, ‘256M’ );

Save the file.
Explore this post to learn some other ways to increase the PHP memory limit.
Step 02: Increase the Upload File Size
Many consider increasing the PHP memory limit and uploading file size to be the same. But they have different sets of responsibilities and functionalities. If the first step doesn’t work out, you must try this step as well.
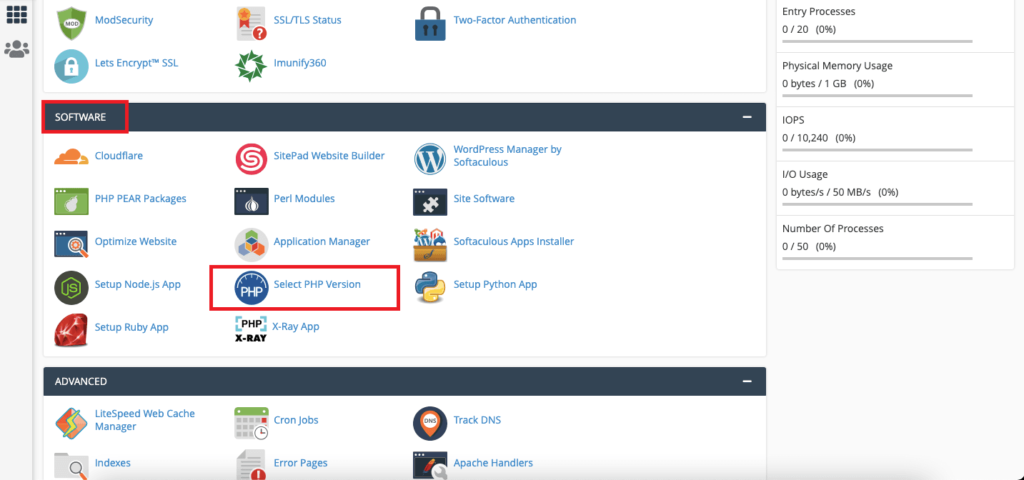
Log into your cPanel and go to the Select PHP Version option.
Come to the Options tab. Set the upload file size limit as you desire in the respective options marked in the image below. They are memory_limit, post_max_size, and upload_max_filesize.
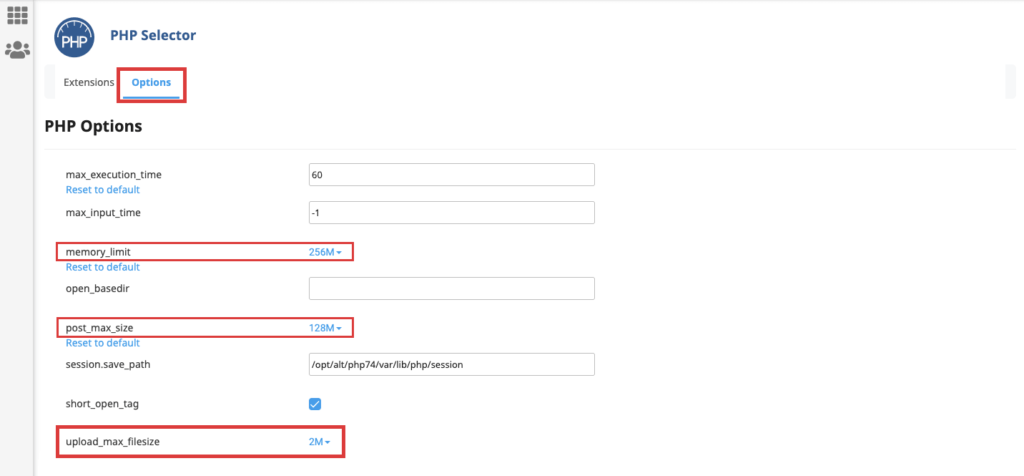
Save the changes before leaving this page.
Explore more methods of how to increase the upload file size in WordPress.
Step 03: Update the File Permissions
When importing media files, your WordPress site must have the necessary permission to access and modify the files you want to import. These permissions determine if your website can read, write, and execute these files and your commands.
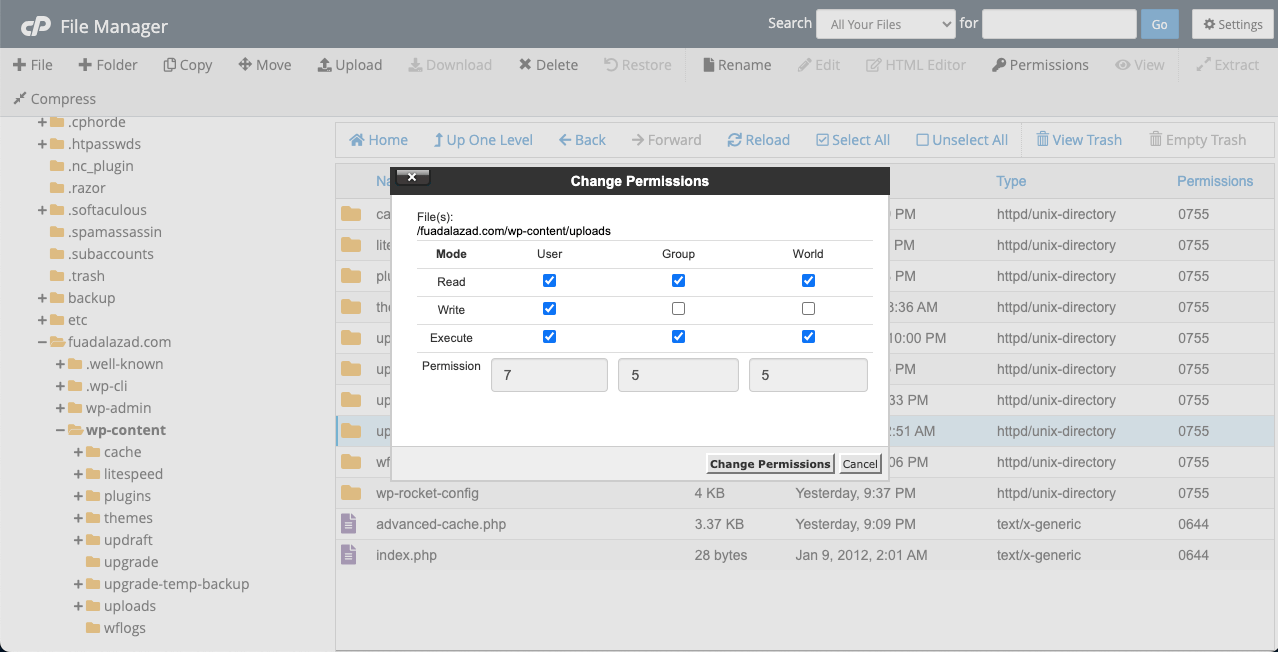
To update the file permissions, go to cPanel > File Manager. Then, navigate to wp-content > uploads. Right-click the Uploads folder. Select the option Change Permissions.
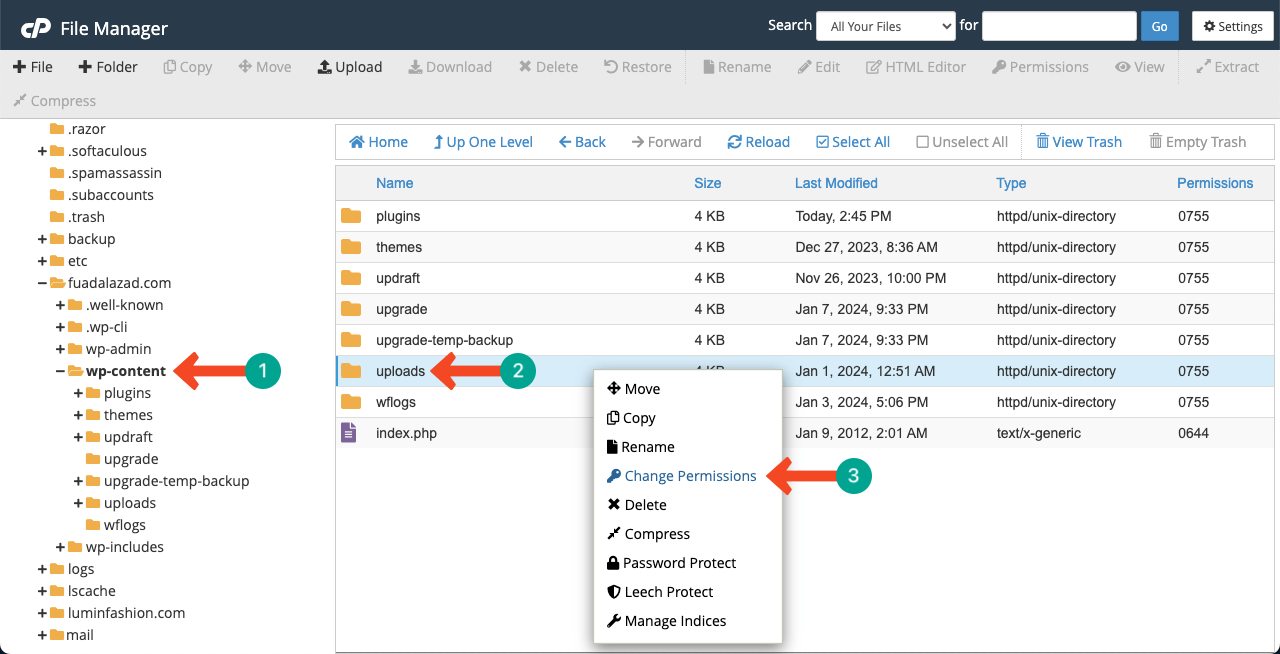
The recommended file permission values for WordPress are 755 and 644. These permissions ensure that the website owner has full access to the files and folders.
You can’t change these values by typing. You have to adjust the tick marks by hitting on the respective boxes. The values will change automatically. Click the Change Permissions button at the end.
Note: Explore different values. Because different permission values may work depending on your site.
Step 04: Fix Server Misconfiguration
There might be many server-side limitations and misconfigurations for why your site may fail to import media in WordPress. One of them is the low server timeout settings. It interrupts the importing process before even WordPress completes it, especially for large media files.
Some firewalls or security settings from your server or network end may blockade the importing process. In addition, if there are DNS resolution problems, your site may have failed to import media in WordPress. It’s better to contact the support team of your web hosting provider to solve the issue.
Explore 35+ most common WordPress errors and how to fix them well.
Step 05: Check File Format Compatibility

WordPress today allows you to store almost any kind of files (images, videos, documents, and audio files) in its media library. Yet, you’ll rarely find some files like SVG that WordPress doesn’t directly support. That means all these files are incompatible with WordPress.
Similarly, some other incompatible file formats for WordPress are AI, ESP, FLA, and PSD. You have to use any third-party plugins to import and use them on your WordPress websites. HappyMedia is a third-party plugin that can help you manage all the media file types in the media library.
Step 06: Increase Disk Space
Web disk space refers to the amount of storage and space available to host the content of a website. This content could be various elements like code, database, text, and media files. If your disk doesn’t have enough space to host all the media files you want to import, the process will fail.
This problem normally takes place when trying to migrate a large website to a smaller web space. So, it’s important to know your disk space. If the space isn’t enough, you must contact your hosting provider and add more hosting space through them.
Step 07: Remove the Corrupted Media Files
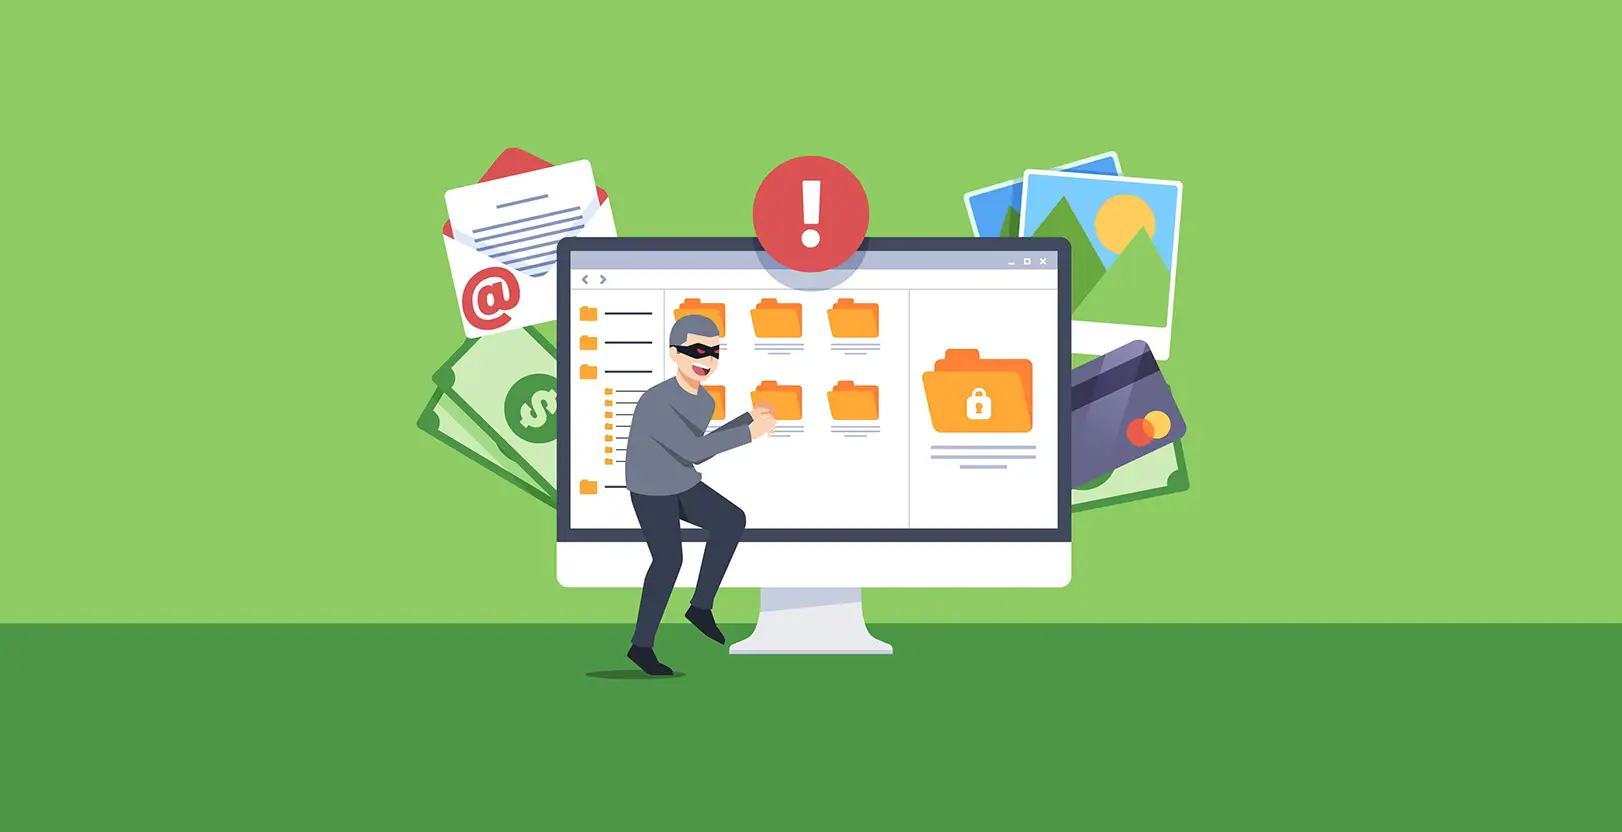
Due to security reasons, WordPress often tends to avoid importing corrupted media files. Even if they are imported, they will show display errors with visual and audio distortions. Media files could be corrupted due to many reasons, like malware infection, system crashes, faulty creation, and continuous interruption while importing the files.
To prevent media file corruption, it’s important to use licensed media creation software (Photoshop, Illustrator, Figma, Canva, etc.). Use anti-virus software on your device so malware can’t affect them. Finally, use a stable migration process so nothing can interrupt the system.
Step 08: Solve the Plugin and Theme Conflicts
By now, all the problems of your website should be solved. If you still face problems in importing media files, there might be a technical bug on your site. Most of the time, this bug exists in activated themes and plugins. What you have to do is deactivate all of them at once.
Now, try importing some media files. If successful, you can definitely understand that your theme or plugin has a bug. Start by reactivating the theme first, followed by each plugin one by one. If any issues arise at a particular stage, it could indicate a potential bug either in the theme or a specific plugin.
Then, contact the particular plugin developer to fix the bug as soon as possible. Once they notify you that the bug is fixed, you can reactivate the plugin. Here’s a complete guide on how to check plugin conflict in WordPress.
Use HappyMedia to Import and Manage Media Files
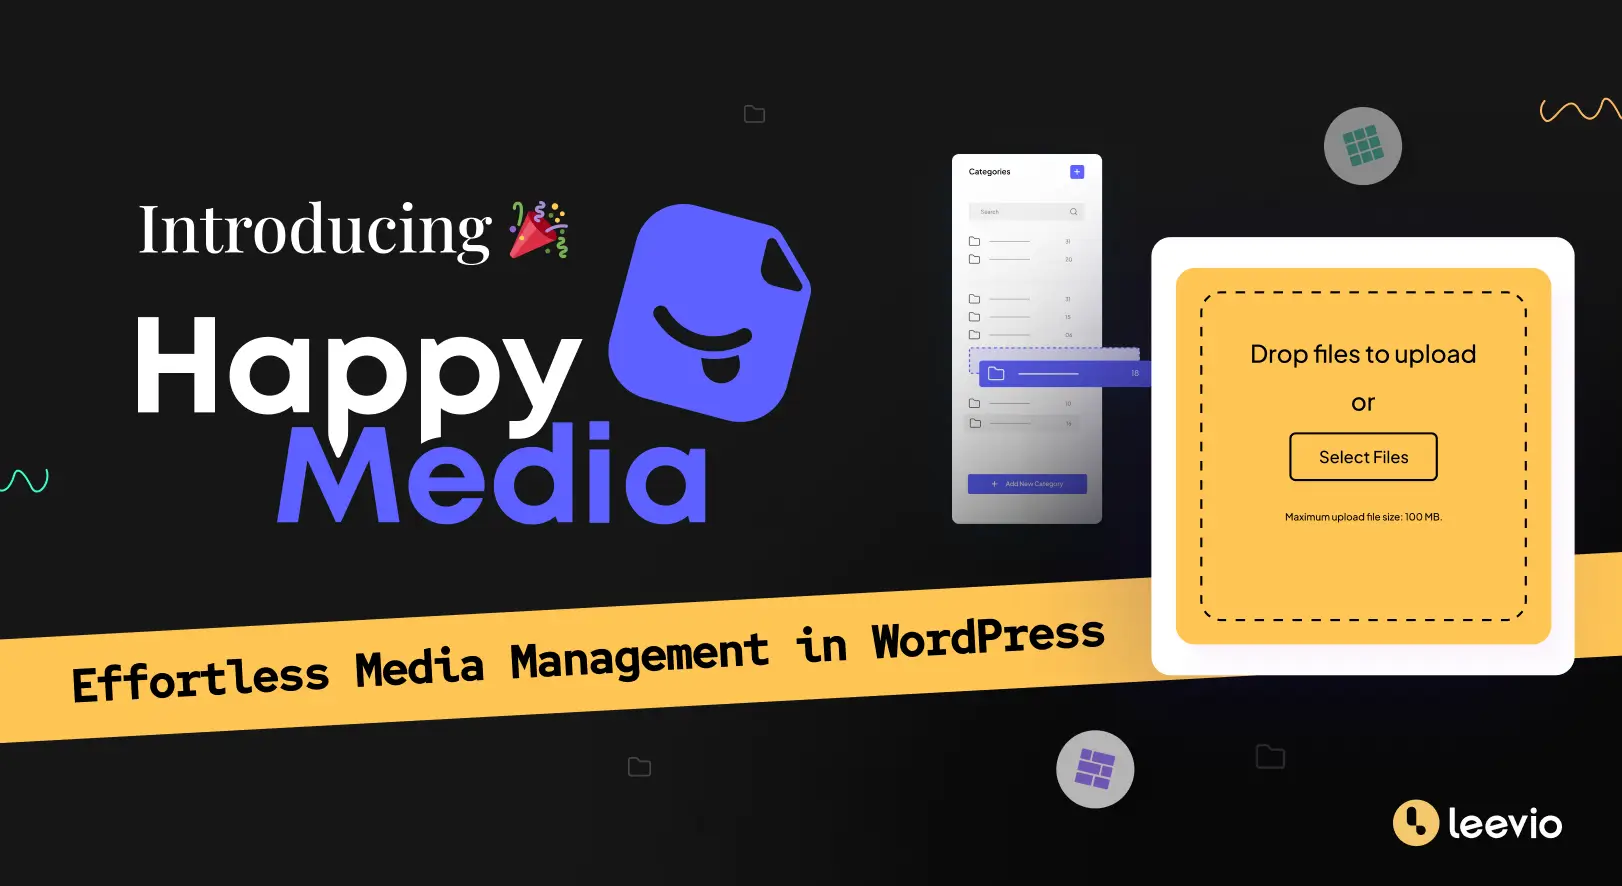
HappyMedia is a robust media file management plugin for WordPress. It simplifies the process of uploading, categorizing, and organizing media files on the backend. You can organize the files, creating countless folders and sub-folders as you need.
You can also name and rename the folders to find out the ones easily when needed. HappyMedia has a drag-and-drop interface. You can categorize the media files, including folders, by drag and drop. The plugin has integrations with many media file repositories like Pexels, Unsplash, and Pixabay.
HappyMedia provides multiple search boxes: one for folder finding and the other one for searching media files in the folder. This can save you a good deal of time in looking for particular ones when you have tons of media files in the backend.
HappyMedia has numerous other features which will surely make you fall in love with this plugin.
FAQ on How to Fix WordPress Failed to Import Media File
How do I know if my media file is corrupted?
If any of your media files are corrupted, it will show an error message, black screen, no sound, jerky playback, flickering, unexpected behaviors, etc.
Can I recover deleted media files in WordPress?
If you haven’t deleted the media files long ago, there are chances that you can get back the deleted files by following the methods below.
1. Check the trash folder to see if the files are available here
2. Check your backup files
3. Utilize the Google cache or Archive.org
4. Consult your hosting provider (they often keep a backup of the websites they’re hosting)
5. Use a media file recovery plugin (last chance)
Why does the media library often stop showing media files?
Due to the following reasons, the WordPress media library often stops showing media files.
1. Conflicting theme or plugins
2. Incorrect file permissions
3. Corrupted media files
4. Server configuration issues
5. Exceeded storage limit
Is it possible to fix corrupted media files on a WordPress site?
You can follow some methods to do this.
1. Replace the corrupted file using the Replace tool or Gutenberg toolbar
2. Use file repairing tools
3. Verify file permissions
What are the best WordPress media file recovery tools?
So far, we have found the following two WordPress media file recovery tools.
1. Media Cleaner: Clean your WordPress!
2. Media Library Recovery
Finishing Note!
Regular maintenance is a big part of any web management system. Often, not your fault, but due to bugs and issues with your installed themes and plugins, you may face many problems, like the one ‘WordPress failed to import media files.’
But no worries! The process for solving most website-related problems is more or less the same. You can also solve many other problems with the solutions we have presented in the above discussion. Mention your feedback about the blog post in the comment box below.
Follow our other articles as well to learn more about how to manage WordPress media files in efficient ways. Thanks for your time!
