Managing media files efficiently is essential for maintaining a fast and responsive website.
HappyMedia’s Image Compression feature is designed to help you compress JPEG and PNG images directly from your media library, saving storage space and enhancing your site’s performance.
In this article, we’ll guide you through the steps to use this feature effectively.
The Importance of Image Optimization
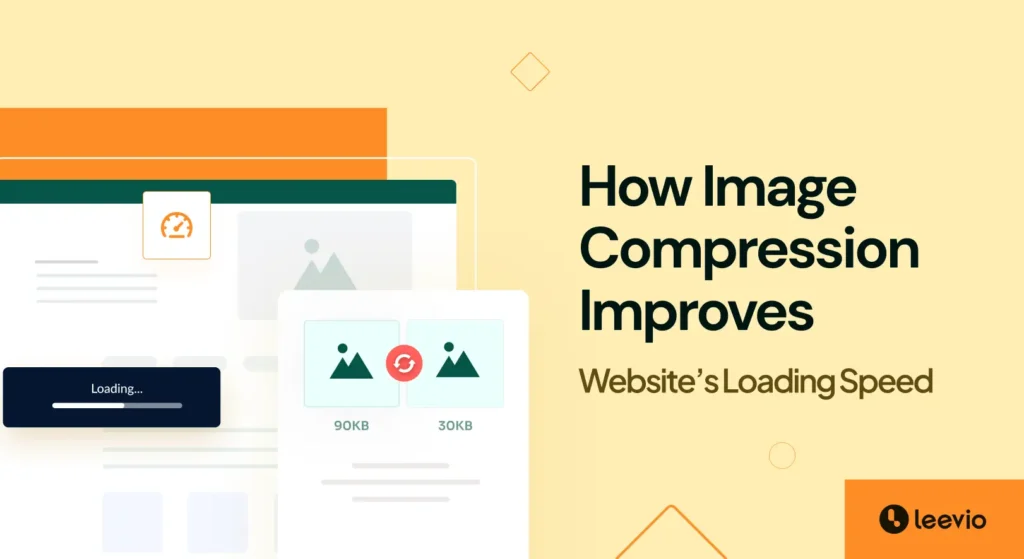
In today’s fast-paced digital world, the speed and performance of your website are crucial for retaining visitors and improving search engine rankings. Large image files can significantly slow down your site, leading to higher bounce rates and lower engagement. Compressing your images can reduce file sizes without sacrificing quality, ensuring faster load times and a better user experience.
Learn more about this from here.
Why Choose HappyMedia for Image Compression?
HappyMedia offers a user-friendly and efficient solution for image compression that is directly within your WordPress dashboard. Unlike other tools that require multiple steps or third-party integrations, HappyMedia’s seamless integration allows you to manage everything from one place. This makes it easy to maintain a fast, efficient website with minimal effort. Moreover, it’s a complete package for your WordPress media management. The image compression feature of HappyMedia makes it more powerful than other media management tools.
What You’ll Need to Use HappyMedia’s Image Compression Feature
To get started with HappyMedia’s Image Compression feature here are the required things,
- HappyMedia Plugin: Ensure you have the HappyMedia plugin installed and activated on your WordPress site.
- Access to WordPress Dashboard: You need administrative access to navigate the HappyMedia settings.
Step-by-Step Guide to Using Image Compression in HappyMedia
Follow this simple guide to use the Image Compression feature in HappyMedia effectively. We’ll walk you through enabling the feature, setting default compression sizes, and compressing images directly from your media library. Optimize your images effortlessly with these easy-to-follow steps.
1. Enabling the Image Compression Feature
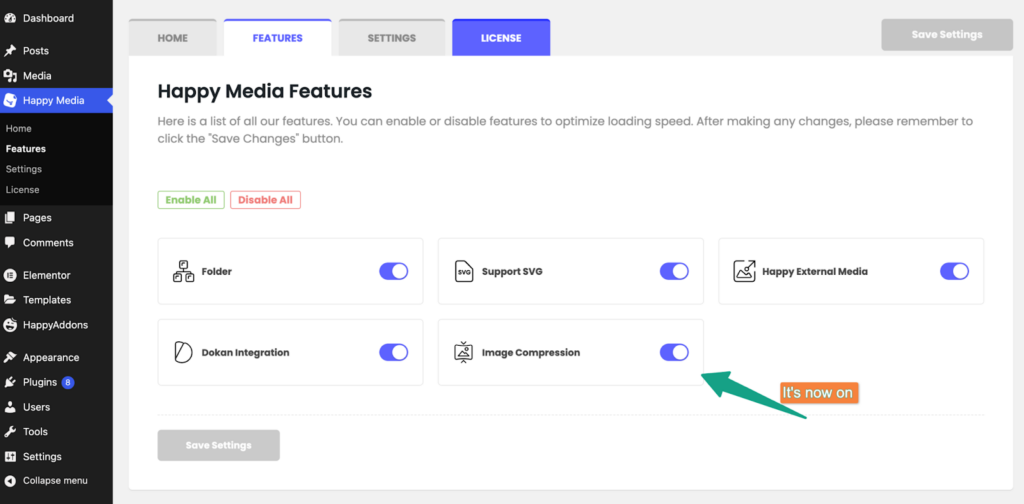
By default, the Image Compression feature is enabled. If you need to check or enable it manually, follow these steps:
- Navigate to Features Page:
- Go to your WordPress dashboard.
- Click on HappyMedia.
- Select Features.
- Enable Image Compression:
- Find the Image Compression option.
- Toggle the switch to enable or disable the feature.
- Click Save Changes.
2. Setting the Default Compression Size for JPEG Images
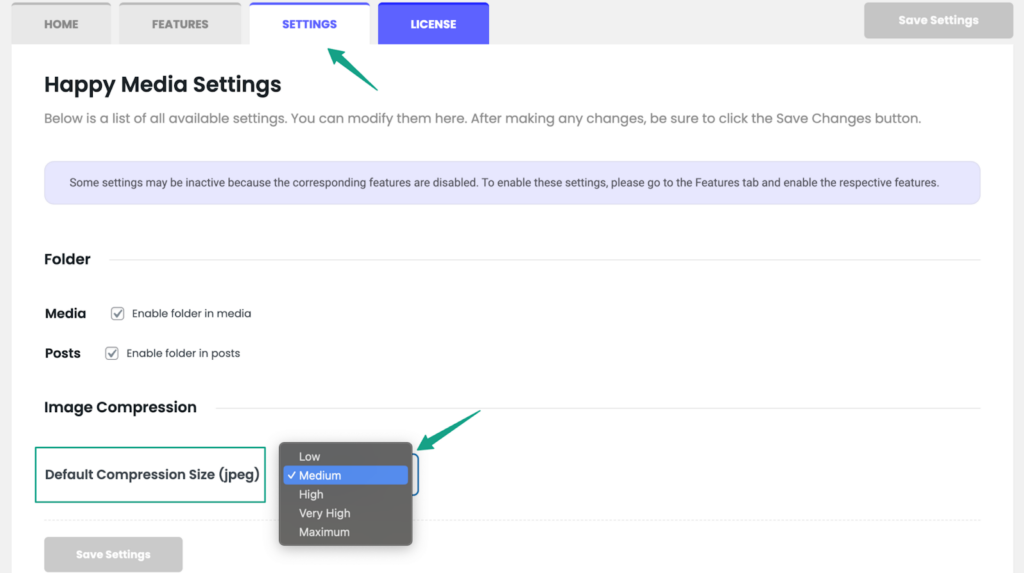
You can set a default compression size for JPEG images to ensure consistency. Here’s how:
- Go to Settings Page:
- In your WordPress dashboard, click on HappyMedia.
- Select Settings.
- Choose Default Compression Size:
- Find the option for Default Compression Size (JPEG).
- Select your preferred size from the dropdown menu.
- Click Save Changes.
3. Compressing Images from the Media Library
You can compress images directly from your media library. Now you can compress JPEG and PNG images only. Here’s how to do it for both JPEG and PNG images.
For JPEG Images:
One of the standout features of HappyMedia’s Image Compression is the ability to choose from five different compression levels for JPEG images: Low, Medium, High, Very High, and Maximum. This flexibility allows you to balance between image quality and file size, ensuring that your images look great while still optimizing for speed and storage.
Here is the process of how you can compress your JPEG images directly from your media library. Follow the process –
- Navigate to Media Library:
- Go to your WordPress dashboard.
- Click on Media to open your media library.
- Select Image and Compress:
- Choose the JPEG image you want to compress.
- Click on the Compress button.
- Select the compression level: Low, Medium, High, Very High, or Maximum, as per your desire. You will see an estimated compressed file size and a visual preview to help you decide the best option.
- Click Compress to start the process.
For PNG Images:
When it comes to PNG images, HappyMedia utilizes the powerful Cloudinary service to provide optimal compression. Cloudinary is known for its advanced algorithms and high-quality compression capabilities, ensuring that your PNG images are compressed efficiently without losing important details. This integration ensures that your site’s performance is enhanced while maintaining visual appeal.
Here is the process of compressing the PNG images. Let’s dive into the process:
- Select Image and Compress: In your media library, select the PNG image you want to compress.
- Click the Compress button.
The image will be optimized using Cloudinary’s service.
4. Managing Original and Compressed Files
For safety, HappyMedia keeps the original files even after compression. If the compressed size doesn’t meet your expectations, you can recompress it or delete the original.
Deleting Images:
Here is the process of deleting the images from your media library.
- Single Image Deletion: Select the image in your media library and Click Delete.
- Bulk Deletion: Select multiple images in your media library. Click Bulk Actions and choose Delete.
Here is the process for deleting images in bulk mode:
PS: Recompression will be possible for the JPEG images. Because PNG image compression will be served by Cloudinary, they always offer the best optimal size for your images.
If you prefer to watch the video tutorial on the image compression feature of HappyMedia, here you go,
FAQs
Q1: What image types does HappyMedia support for compression?
HappyMedia supports JPEG and PNG image formats for compression.
Q2: How do I enable or disable the Image Compression feature?
Go to HappyMedia > Features > Image Compression. Toggle the switch to enable or disable, then click Save Changes.
Q3: Can I set a default compression size for JPEG images?
Yes, navigate to HappyMedia > Settings > Choose Default Compression Size (JPEG), select your preferred size, and save the changes.
Q4: How do I compress images from my media library?
Select an image in your media library, click the Compress button, choose your desired compression level, and click Compress.
Q5: Is the original image file safe?
Yes, the original file is kept for safety. You can recompress it if needed or delete it to save space.
Final Verdict
HappyMedia’s Image Compression feature makes it easy to manage and optimize your images, improving your site’s performance and saving storage space. With straightforward settings and powerful compression options, you can ensure your media library is always in top shape. Start using HappyMedia’s Image Compression feature today and see the benefits for yourself.
