Over time, your WordPress media library can become cluttered with unused files. These files not only take up valuable storage space but also can slow down your website. Regularly cleaning up your media library improves site performance, makes it easier to manage your files, and saves storage costs.
In this guide, we’ll show you how to clean WordPress media library using easy methods and plugins like Jordy Mewo’s Media Cleaner and WP-Optimize Plugin. Let’s dive in and breathe ease into your website’s performance.
Table of Contents
How Media Library Bloat Affects Website Performance and SEO

An overloaded media library can negatively impact your website’s speed, user experience, and search engine rankings. By understanding how media bloat affects performance and SEO, you can see the importance of keeping your media library optimized and clutter-free.
1. Increased Load Time
Large, unoptimized media files significantly slow down your website’s load time. Search engines like Google prioritize faster sites, meaning a slow site could negatively affect your rankings.
2. Mobile Performance Issues
With a cluttered media library, images that aren’t properly optimized can result in long load times on mobile devices. Since mobile traffic is a major part of web browsing, this can lead to poor user experience and lower mobile SEO rankings.
3. Reduced Crawl Efficiency
Search engine bots crawl your site to index it for search results. A bloated media library can reduce their efficiency, as large file sizes and unnecessary media increase the amount of data to process. This may cause your site to be indexed less frequently or inaccurately.
4. Increased Bounce Rates
Slow-loading pages caused by excessive media files lead users to leave your site before it fully loads. This increases your bounce rate, which negatively impacts SEO rankings and user engagement.
5. Impact on Server Resources
Unnecessary media files consume server resources, leading to slower database queries and general performance degradation. As a result, your website might experience slower response times, especially during high-traffic periods.
Why Clean Up Your WordPress Media Library?

As your WordPress site grows, unused images, videos, and files can accumulate in your media library. These unnecessary files not only consume storage space but also impact site performance and make it harder to manage content. Regularly cleaning up your media library helps to improve site speed, reduce hosting costs, and simplify file management. By keeping things organized and lean, you ensure smoother website performance and a more efficient workflow for your content creation.
1. Better Website Speed and Performance
Unused images and files can bog down your WordPress site. Cleaning up unnecessary files makes your site faster, which improves user experience and SEO rankings.
2. Save Storage Space
Media files take up storage space on your hosting server. A cluttered media library may lead to increased hosting costs. Regularly cleaning up your media library helps save on storage costs.
3. Easier Backup and Restore
More files mean longer backups. When your media library is clean, you reduce the time it takes to back up and restore your website in case of an issue.
4. Boost SEO Rankings
Page load time is an important factor in SEO. By removing unused files, you can improve your site’s load time, which can positively affect your search engine rankings.
Identifying Unused Files in the WordPress Media Library
Unused media files can accumulate in your WordPress library, causing unnecessary clutter and impacting site performance. Identifying and removing these files, whether manually or with the help of plugins, helps streamline your media library, enhance site speed, and optimize storage.
Manual Identification
If you prefer a hands-on approach, manually locating unused files in WordPress is possible but can be time-consuming. Follow these steps to find and delete unused media:
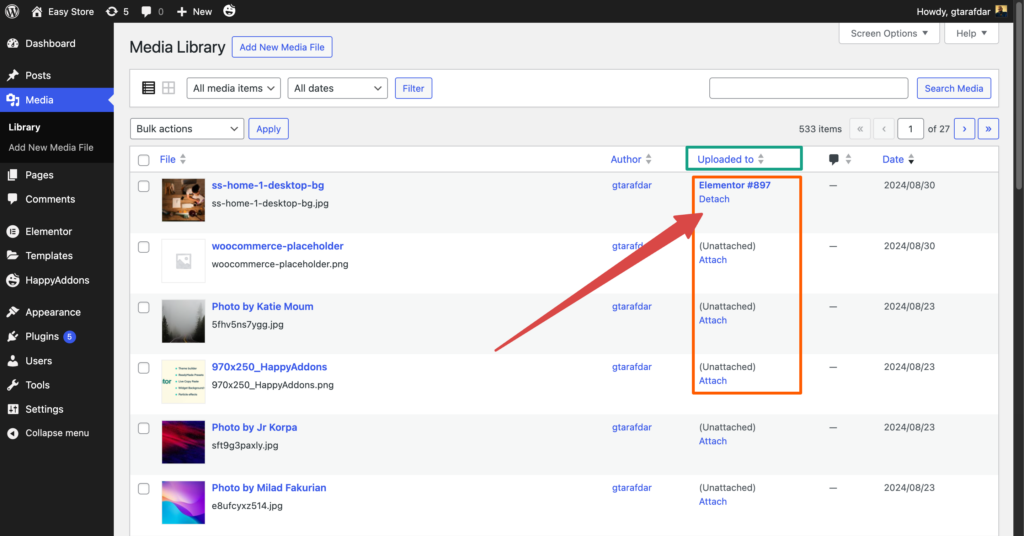
- Go to the Media Library: Navigate to Media > Library in your WordPress dashboard.
- Sort by Date or Type: Filter or sort files by upload date or file type to identify older or irrelevant files.
- Check Uploaded to Column: If your media file is attached to a page or post it will show the page or post name.
- Delete Unused Files: If a file is no longer linked to any posts or pages, select it in the media library and click Delete Permanently.
While this method ensures precision, it’s labor-intensive, especially for large websites. That’s where automation tools come in.
Plugins for Automating the Process
Automating the process of detecting unused files is a more efficient solution. Several plugins can scan your media library, highlight unused files, and safely remove them. Here we will share two plugins, Media Cleaner and WP-Optimize.
Media Cleaner by Meow Apps
Media Cleaner is a popular plugin that scans your entire WordPress site and identifies files that are no longer in use. It goes beyond the basic attachment check by analyzing your entire database to detect unlinked files, including those hidden in custom fields and page builders.
- How it works: Media Cleaner provides a simple interface to scan your library. After running a scan, it lists files that aren’t linked to any posts, pages, or other elements on your site.
- Safety features: It offers a trash feature, so files are first moved to a temporary folder for review before permanent deletion, ensuring you don’t accidentally remove critical files.
How to Set Up and Use Media Cleaner (Free Version) on WordPress
Media Cleaner is a handy plugin for cleaning up unused media files in your WordPress site. Here’s a simple, step-by-step guide to using it:
1. Install and Activate the Plugin
- Go to Plugins > Add New in your WordPress dashboard.
- Search for “Media Cleaner” by Meow Apps.
- Click Install Now, then Activate.
2. Access Media Cleaner Settings
- In the WordPress admin menu, click on Meow Apps.
- Select Media Cleaner to open the plugin’s settings interface.
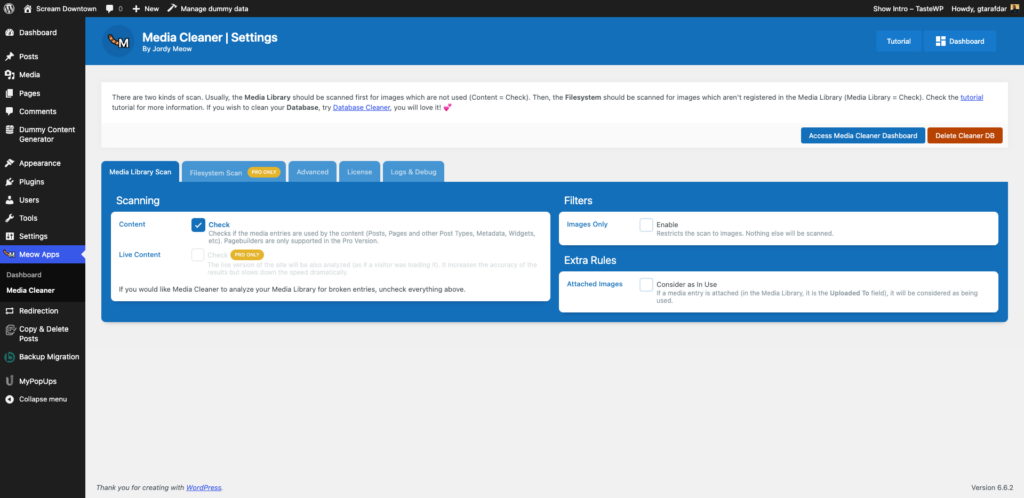
3. Set Up the Scan
Here is the process for the scanning process –
Media Library Scan:
- This is the default scan when you open Media Cleaner.
- Check “Content” to search for unused media in your posts and pages.
- Optional: Check “Images Only” to restrict the scan to image files.
- Optionally, use “Extra Rules” to consider attached images as used by checking “Consider as In Use”
4. Run the Scan
- Go to the Media Cleaner Dashboard or click on the Cleaner option in the left menu.
- Choose Media Library or Filesystem from the drop-down menu based on your scan choice.
- Click Scan to start the process.
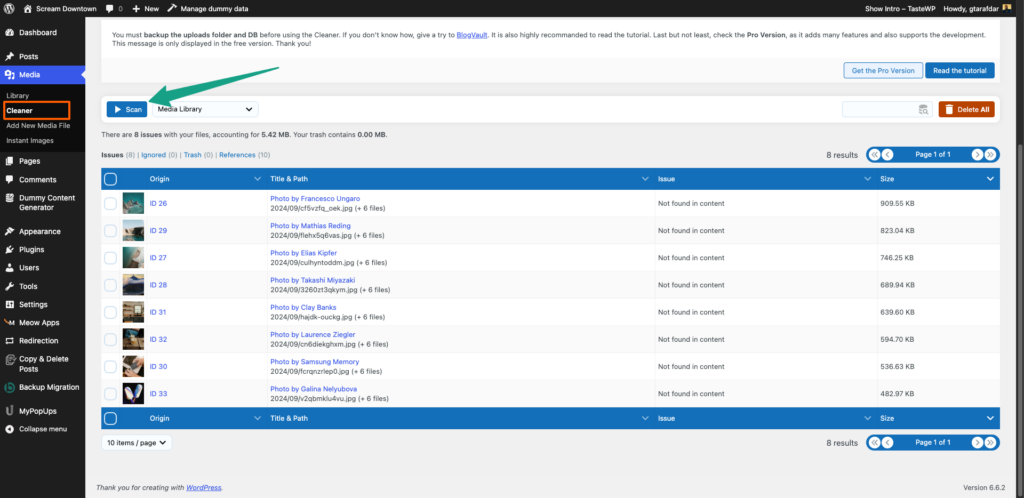
5. Review and Clean Up
- After the scan, review the results. Media Cleaner will list unused files.
- You can:
- Delete All: Click the red Delete All button to remove all identified files.
- Delete Selected: Check individual files and click Delete X Entries to remove selected files.
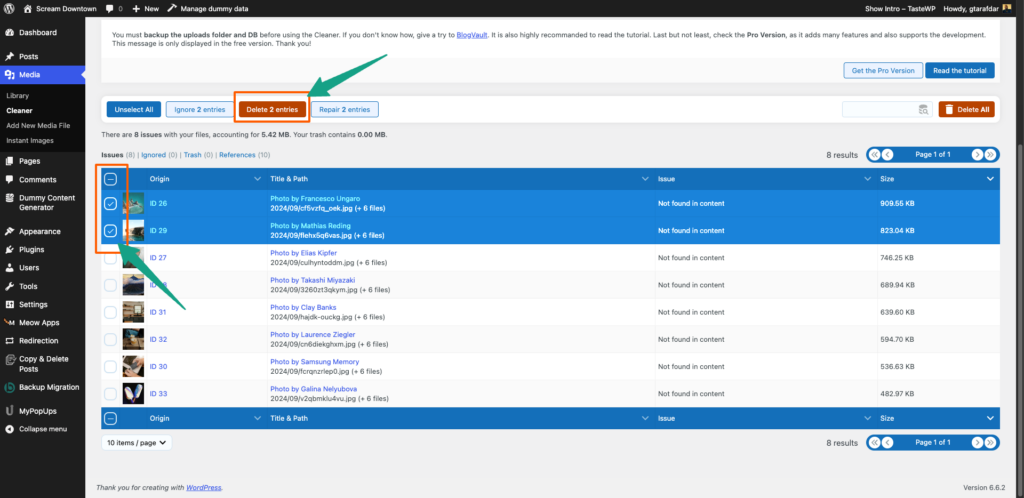
- Restore Files (if needed):
- If you delete a file by mistake, find it in the Trash.
- Select the file and click Recover X Entries to restore it.

Note: Always ensure you have a backup of your site before performing any cleanup tasks. This protects you from accidental data loss.
This guide covers the essential steps for using the free version of Media Cleaner effectively.
Overview of WP-Optimize Plugin
WP-Optimize is another excellent tool that not only helps with cleaning up unused media files but also optimizes your database and compresses images.
- How it works: WP-Optimize scans for media files that are not being used anywhere on your site. You can manually review these files before deleting them.
- Additional features: This plugin also compresses images to save storage space and improve page load speed. Plus, its database optimization features help enhance overall site performance.
Both plugins are reliable and make media cleanup simple, even for large websites. Whichever you choose, you’ll streamline file management and enhance site performance.
Backup Reminder
Before cleaning up your media library, always back up your entire website, including media files and the database. This ensures that if something goes wrong or a file is accidentally deleted, you can restore everything without losing any important content. You can use plugins like UpdraftPlus or BackupBuddy to create full backups before starting the cleanup process.
How to Organize and Maintain a Clean WordPress Media Library

Cleaning up your media library is just the first step. To prevent it from becoming cluttered again, it’s important to organize and maintain it regularly.
1. Use a Folder Management System
Instead of letting all your media files sit in a single folder, you can organize them into subfolders for better management. However, WordPress doesn’t have native folder management capabilities. This is where plugins like HappyMedia come in.
HappyMedia for Folder Management
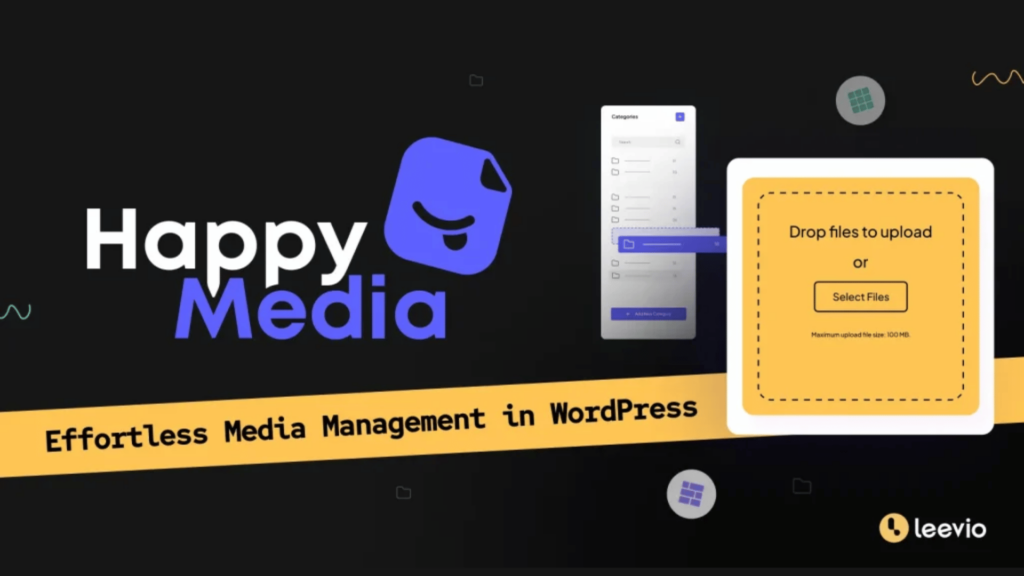
HappyMedia is a powerful tool that allows you to organize your media files into folders and subfolders, making it easy to find and manage your images and media files.
Here’s how to use HappyMedia:
- Purchase and Activate HappyMedia from here.
- Go to Media Library to create folders and subfolders for your files.
- Drag and drop your files into the appropriate folders.
Using HappyMedia will help keep your media library organized, so you can easily find the files you need without going through hundreds of unorganized files.
2. Regular Maintenance
It’s essential to schedule regular media cleanups. Depending on how frequently you upload new files, aim to clean your media library at least once every three months. You can do this manually or set reminders to run a cleanup using your preferred plugin.
3. Compress and Optimize Images
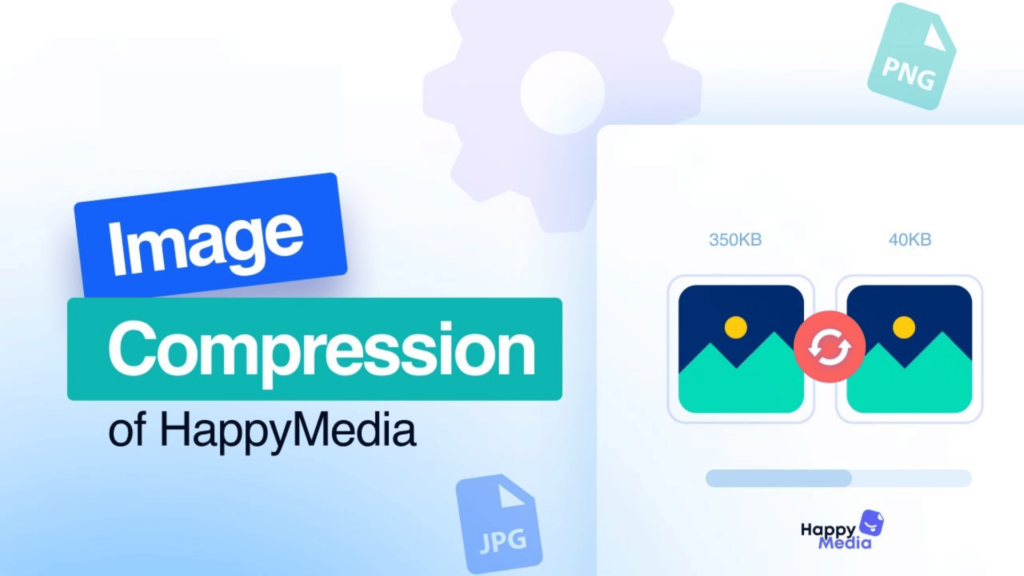
Another way to keep your media library clean is to compress your images. Compressing images reduces file size without sacrificing quality, saving storage space and improving load times. HappyMedia also has an image compression feature that makes it easy to compress files directly from your WordPress dashboard.
🔖 Learn More → How to Use the Image Compression Feature of HappyMedia
4. Use Optimized File Formats
Ensure you’re using appropriate formats for different types of media. For example, use JPEG for photographs and PNG for graphics with transparent backgrounds. Using the right format helps keep file sizes in check.
Common Mistakes to Avoid While Cleaning Your Media Library of WordPress
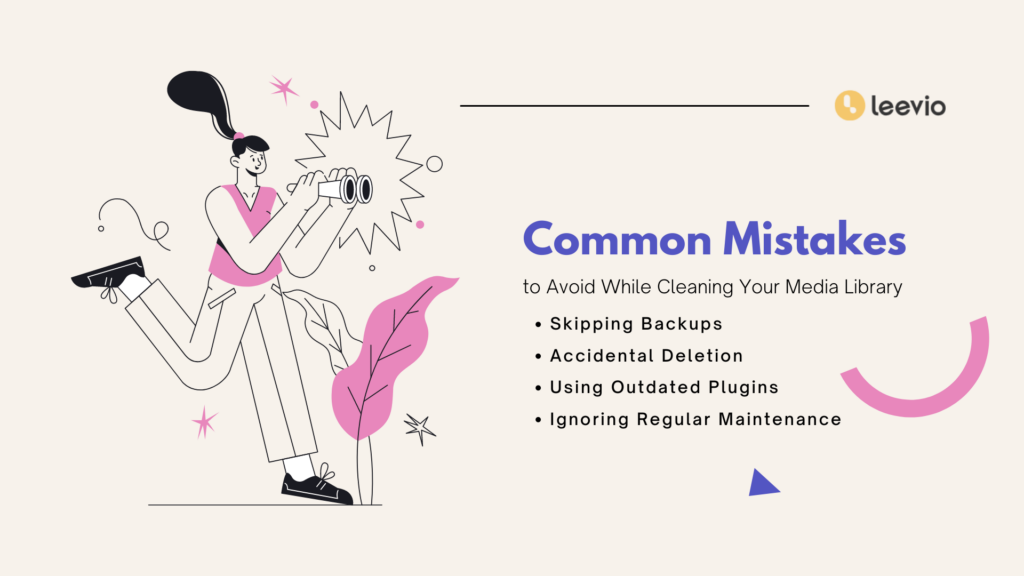
When cleaning your WordPress media library, it’s easy to make mistakes that can lead to data loss or site issues. To avoid problems, ensure you back up your site, double-check files before deletion, and always use up-to-date plugins for a smooth cleanup process.
1. Not Backing Up Before Cleaning
Before making any changes to your media library, always back up your site. This ensures that you can restore your files if something goes wrong during the cleanup process.
2. Deleting Important Files
Be careful when selecting files for deletion. Make sure the files aren’t linked to any posts, pages, or widgets before deleting them. Plugins like Media Cleaner provide extra safety features to avoid mistakenly deleting critical files.
3. Using Outdated Plugins
Always ensure the plugins you use for media cleaning are up-to-date and compatible with your WordPress version. Outdated plugins can cause conflicts or errors during the cleaning process.
FAQs
1. Can I recover a deleted media file in WordPress?
Yes, if you have a backup of your site. Always back up your media files before cleaning.
2. What happens if I delete an image that’s still in use?
If you delete an image that’s still linked to a post or page, the image will no longer appear, leaving a broken link on your site. Always double-check before deleting.
3. How often should I clean my WordPress media library?
Cleaning up your media library every three to six months is ideal, depending on how frequently you upload new files.
Keep Your WordPress Media Library Clean for Optimal Performance and Easy Management
Keeping your WordPress media library clean and organized is crucial for maintaining a fast, efficient website. Whether you choose to clean manually or use plugins like Mewo Media Cleaner and WP Optimize, the process doesn’t have to be complicated. Plus, with tools like HappyMedia for folder management and image compression, you can maintain an organized media library with minimal effort.
Make it a habit to regularly clean up your media library, and you’ll not only improve your site’s performance but also streamline your content creation process. Ready to clean up your WordPress media library? Start today and breathe ease into your site’s performance!
